Dynamic Operations in Terraform with Functions
Streamline Your Infrastructure Management: Learn How to Perform Dynamic Operations in Terraform with Functions
Introduction
The Terraform configuration language allows you to write declarative expressions to create infrastructure. While the configuration language is not a programming language, you can use several built-in functions to perform operations dynamically.
In this blog, you will:
use the
templatefilefunction to create an EC2 instance user data script dynamically.use the
lookupfunction to reference values from a map.use the
filefunction to read the contents of a file.
Prerequisites
You can complete this tutorial using the same workflow with Terraform OSS or Terraform Cloud. Terraform Cloud is a platform that you can use to manage and execute your Terraform projects. It includes features like remote state and execution, structured plan output, workspace resource summaries, and more.
I am using Terraform Cloud
Use templatefile to dynamically generate a script
AWS lets you configure EC2 instances to run a user-provided script -- called a user-data script -- at boot time. You can use Terraform's templatefile function to interpolate values into the script at resource creation time. This makes the script more adaptable and reusable.
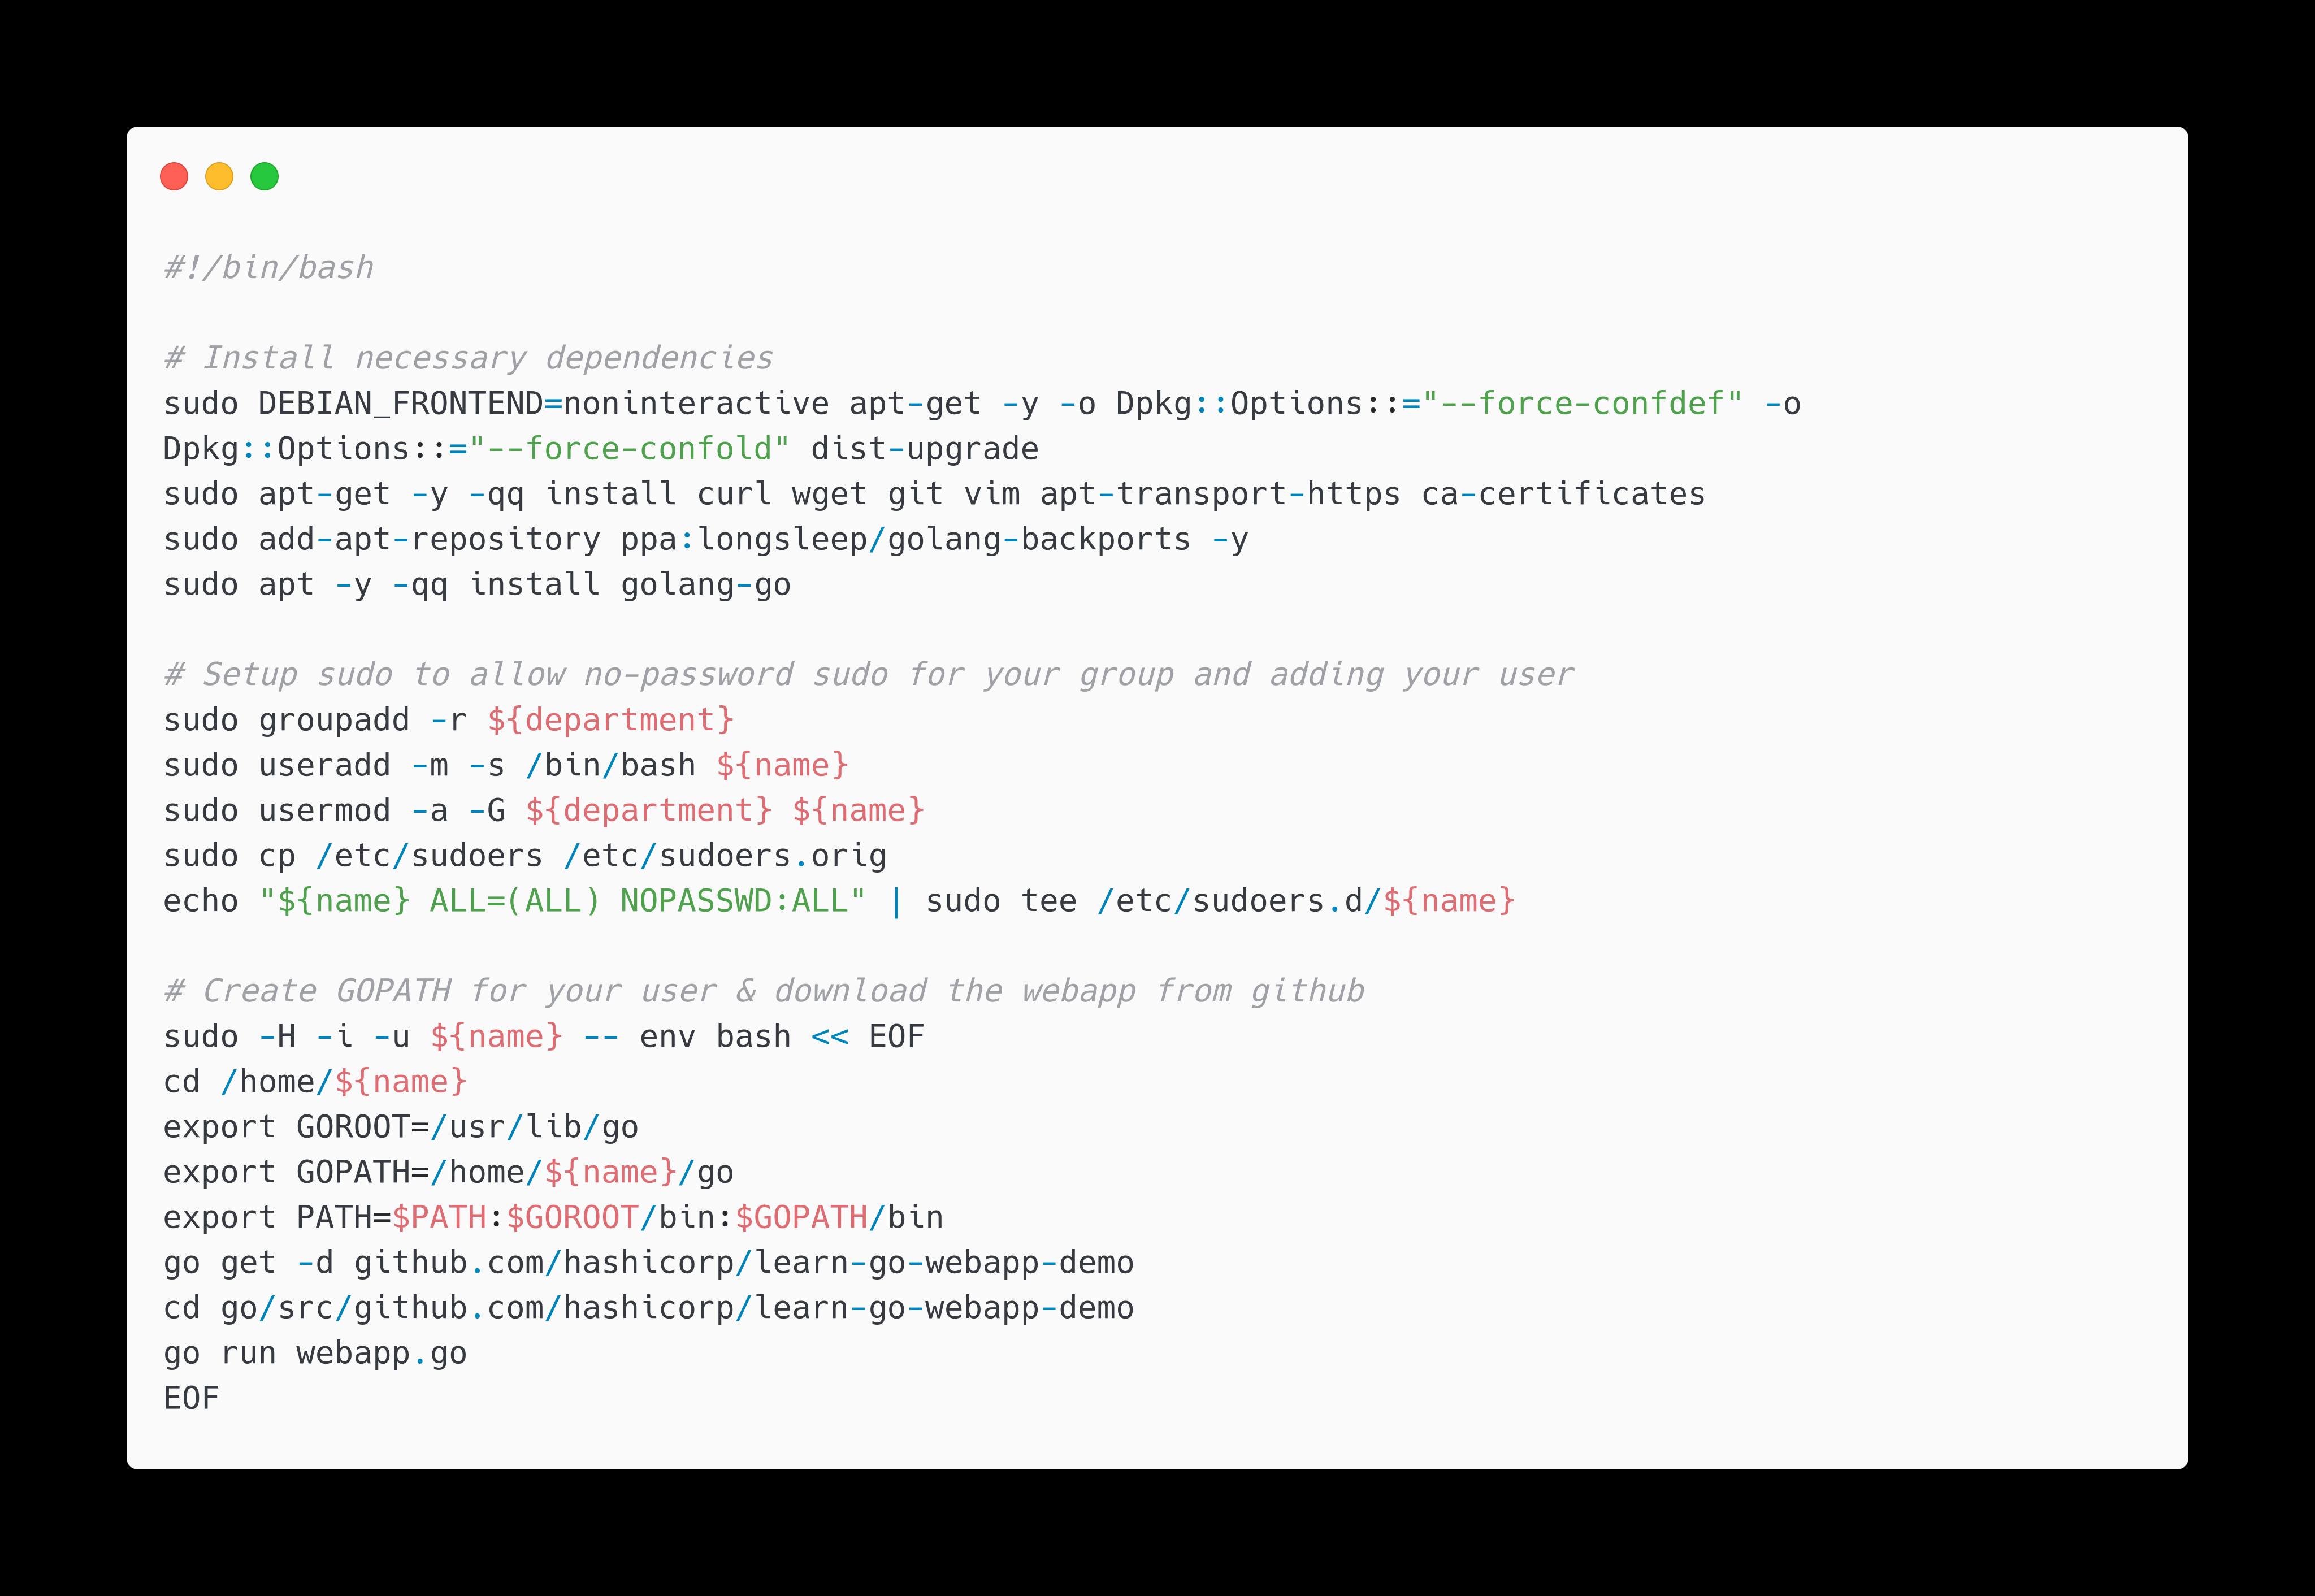
The user_data.tftpl file, which will be the user data script for your EC2 instance. This template file is a shell script to configure and deploy an application. Notice the ${department} and ${name} references -- Terraform will interpolate these values using the templatefile function.
user_data.tftpl
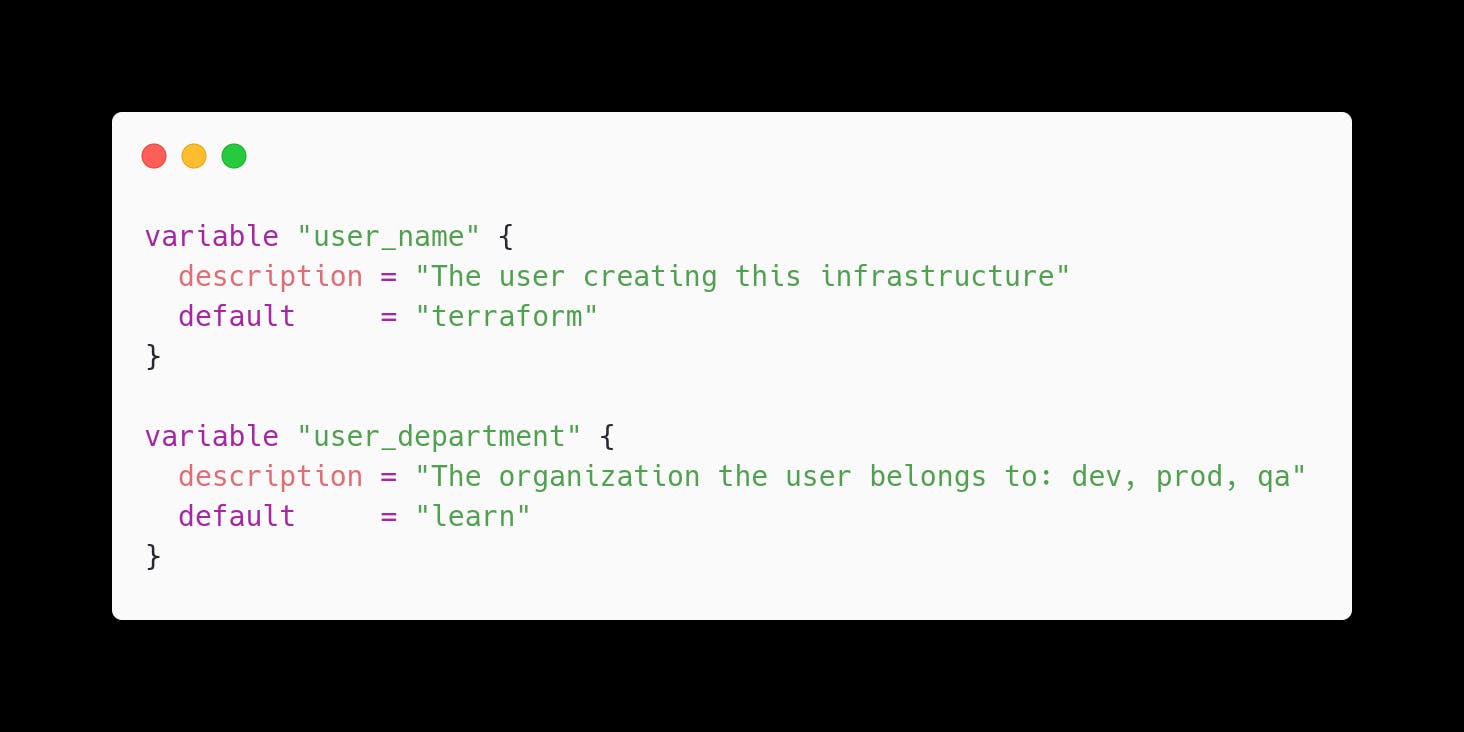
Next, the variables.tf file. This file includes definitions for the user_name and user_department input variables, which the configuration uses to set the values for the corresponding template file keys.
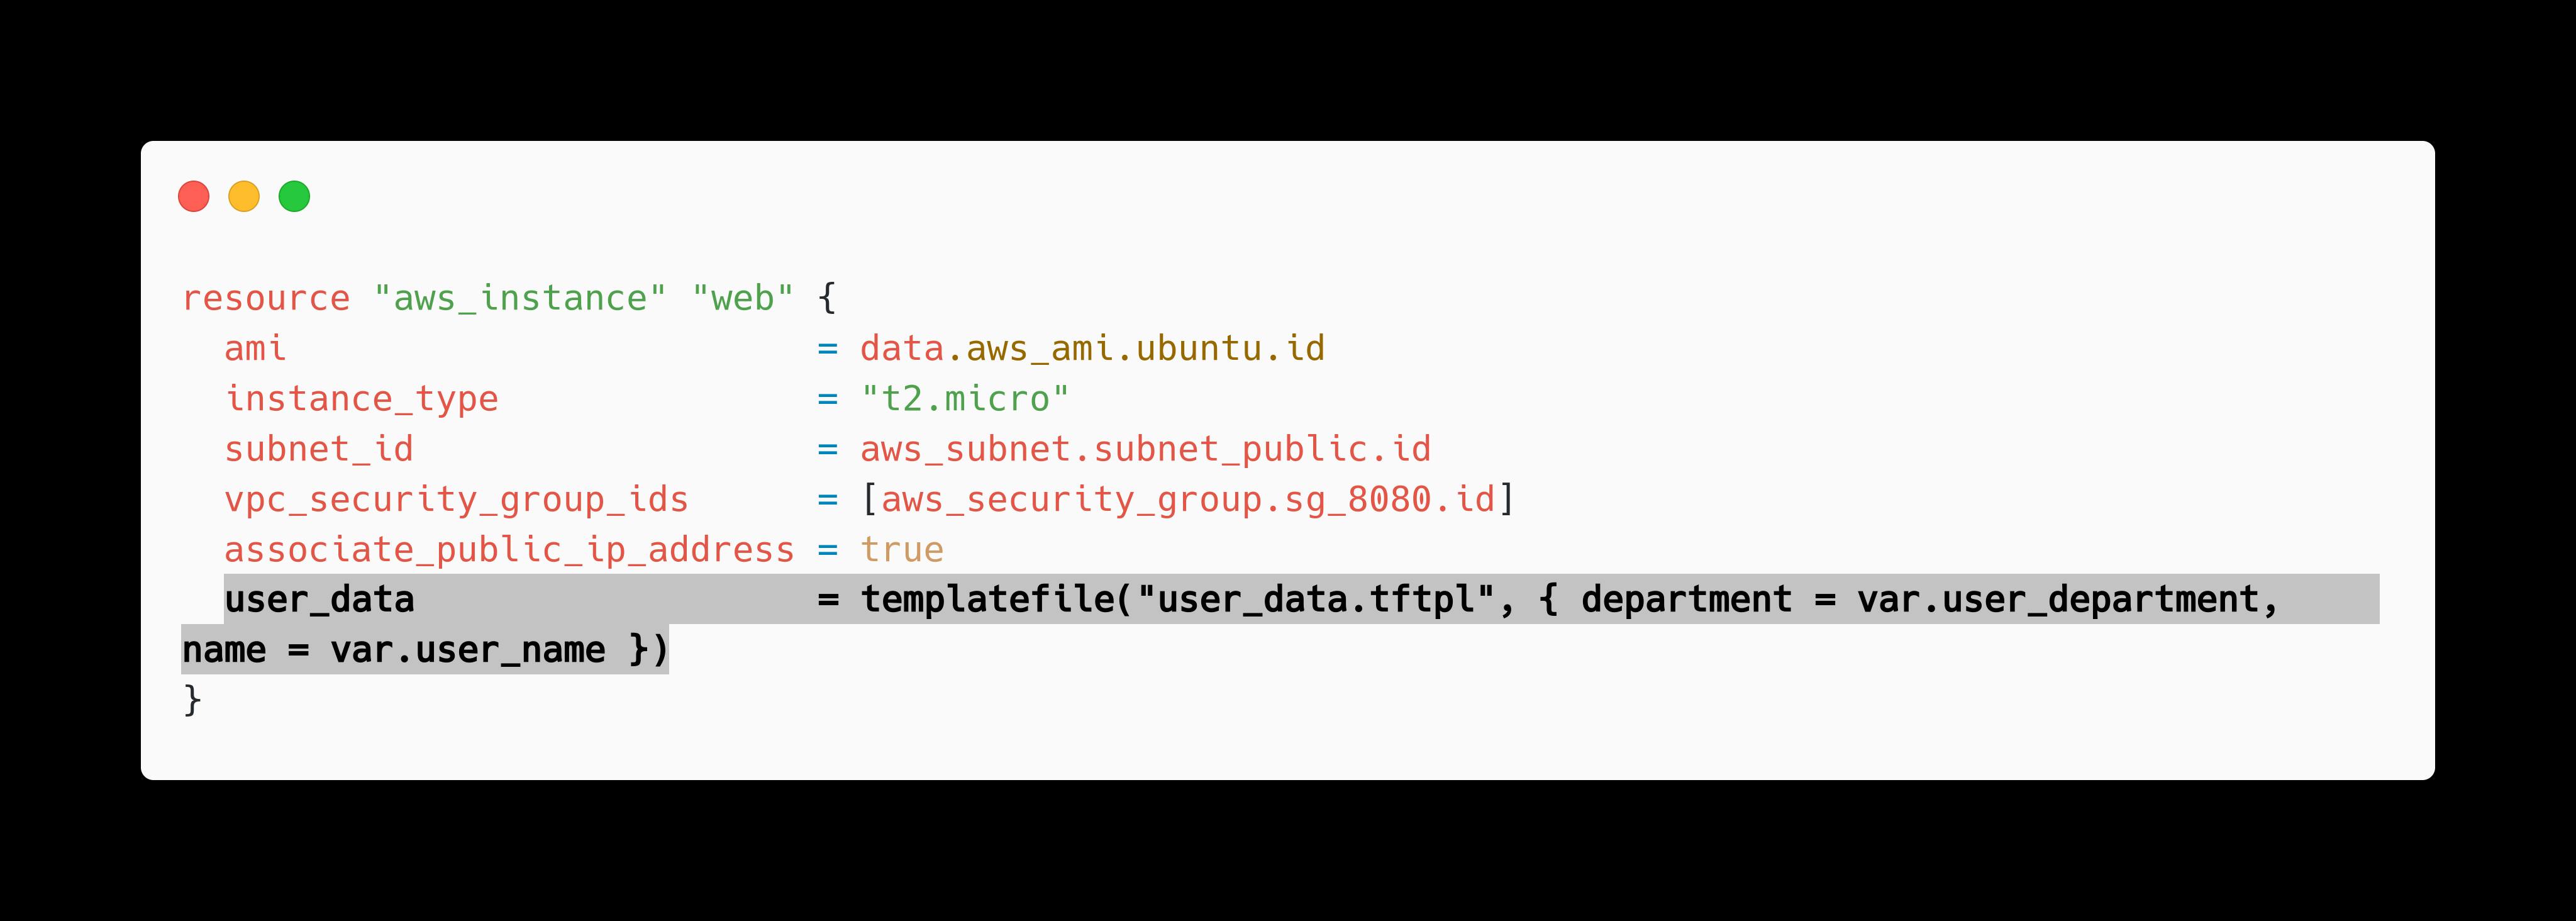
Now main.tf. Add the user_data attribute to the aws_instance resource block as shown below. The templatefile function takes two arguments: the template file name and a map of template value assignments.
save your changes.
Create infrastructure
For Terraform Cloud users: Open terraform.tf file and uncomment the cloud block. Replace the organization name with your own Terraform Cloud organization.
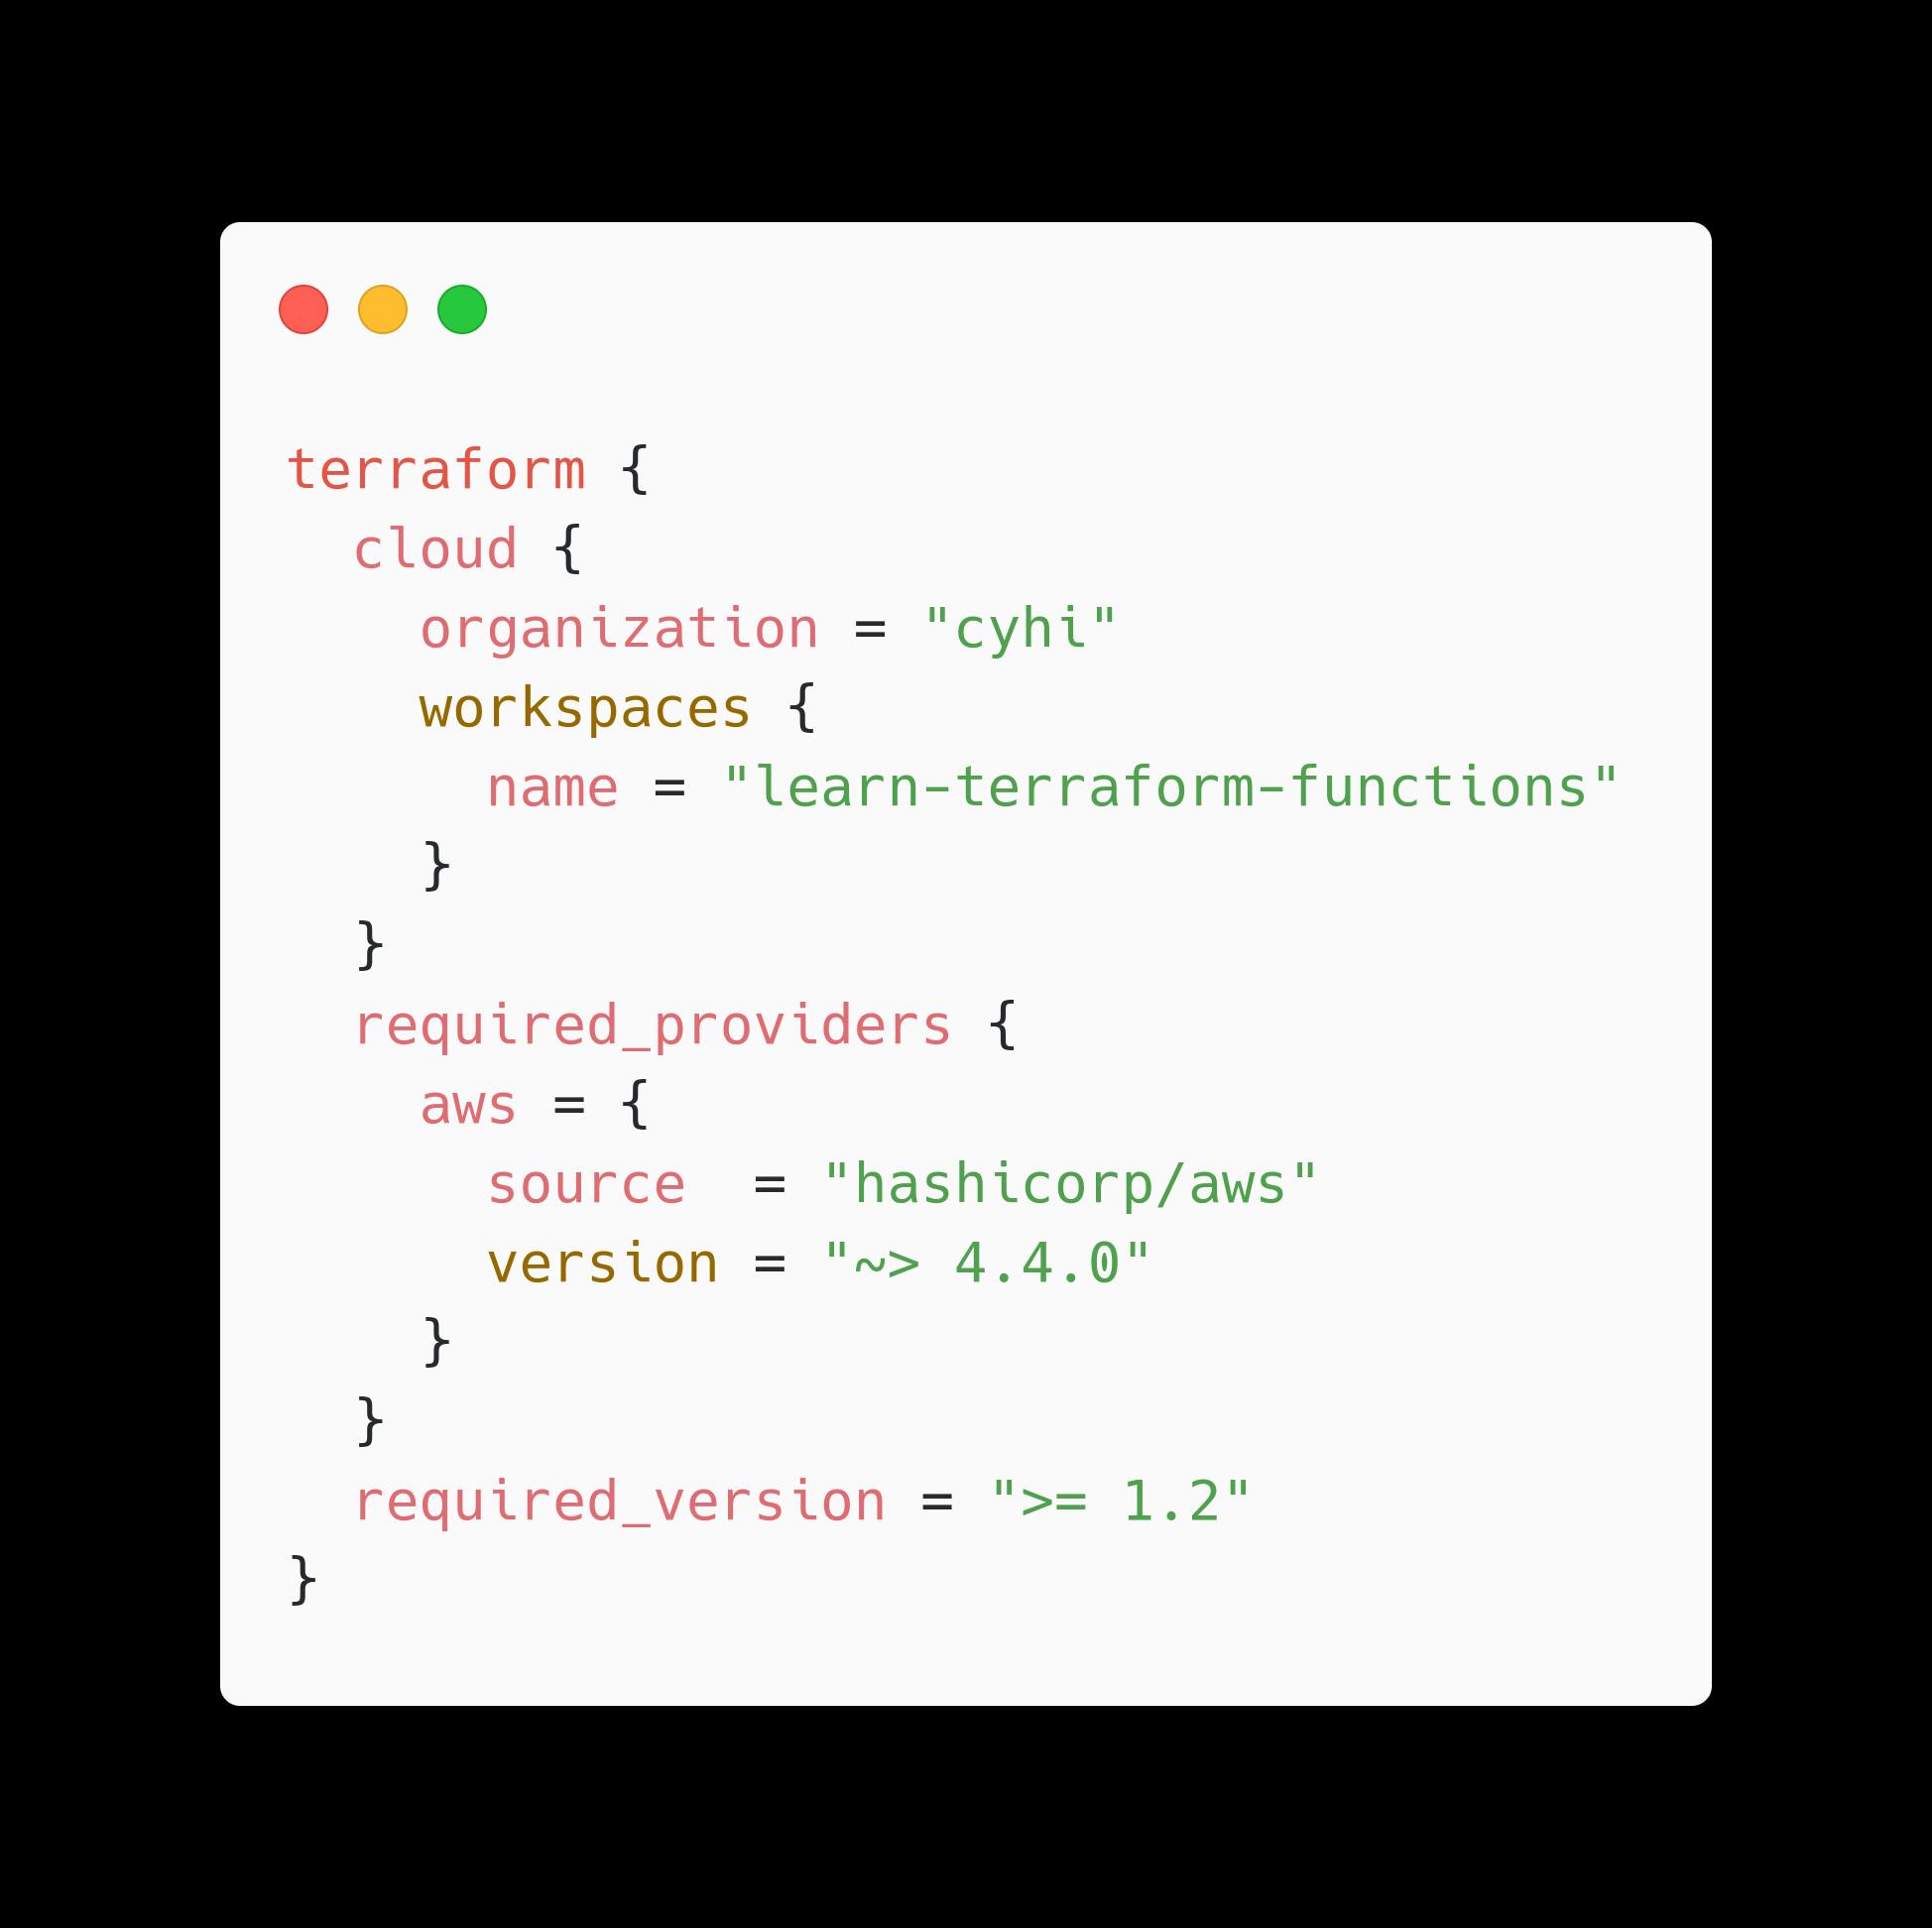
Initialize your configuration. Terraform will automatically create the learn-terraform-functions workspace in your Terraform Cloud organization.
Apply your configuration.
Plain Text
terraform apply -auto-approve
Terraform provisions your network configuration, instance, and provisioning script necessary to launch the example web app. Your web_public_address output in your terminal is the address of your web app instance. Navigate to that address in your web browser to verify your configuration.
Use lookup function to select AMI
The lookup function retrieves the value of a single element from a map, given its key.
Add the following configuration to your variables.tf file to declare a new input variable.
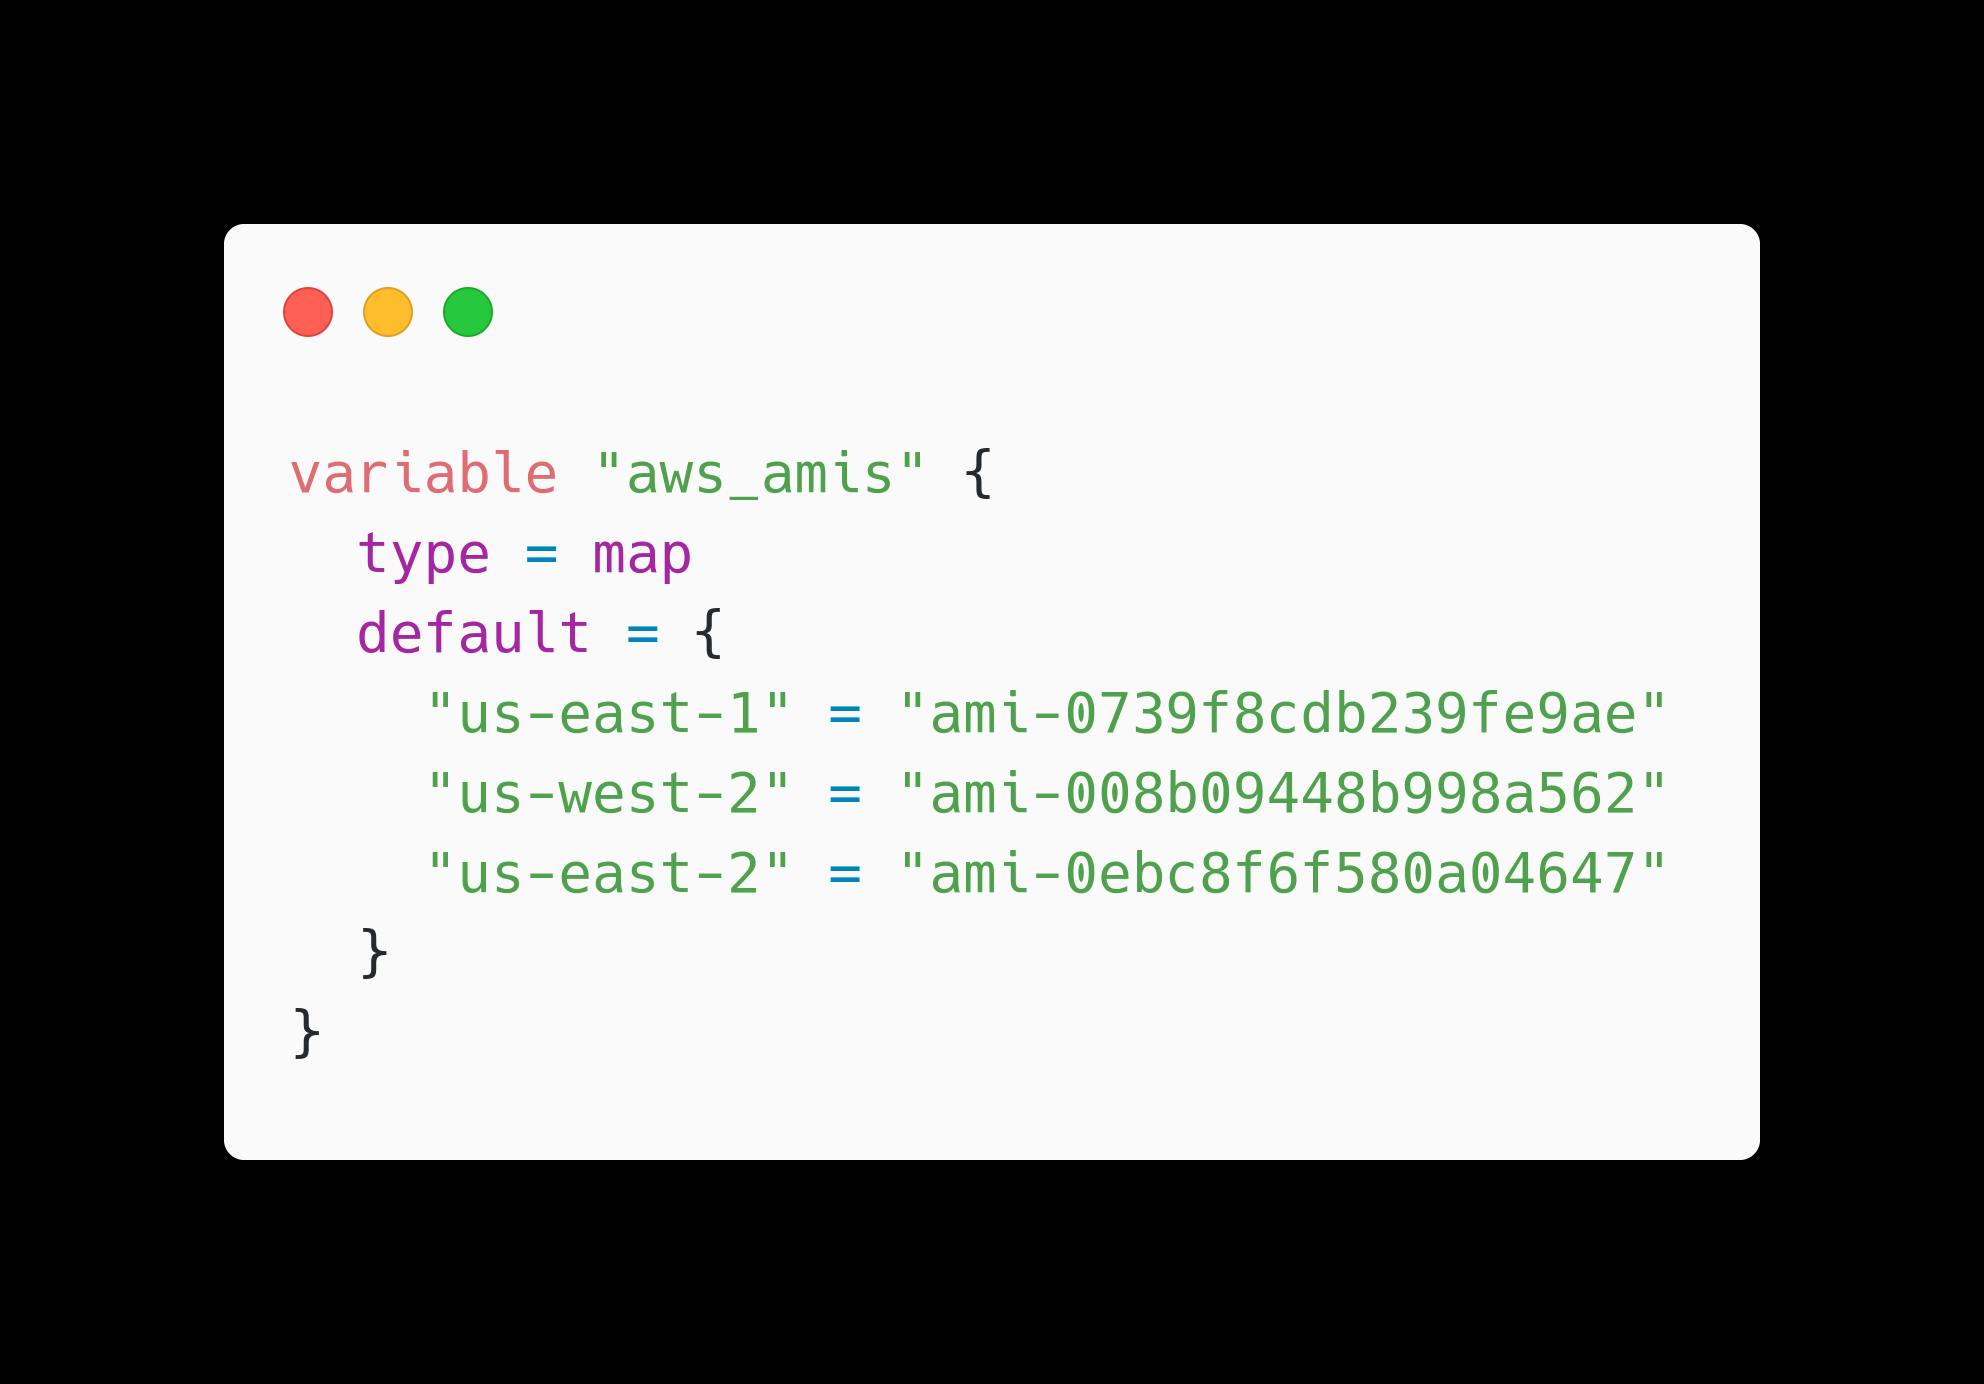
This input variable includes a default value of a map of region-specific AMI IDs for three regions.
Now, remove the data source for your AMI ID from main.tf
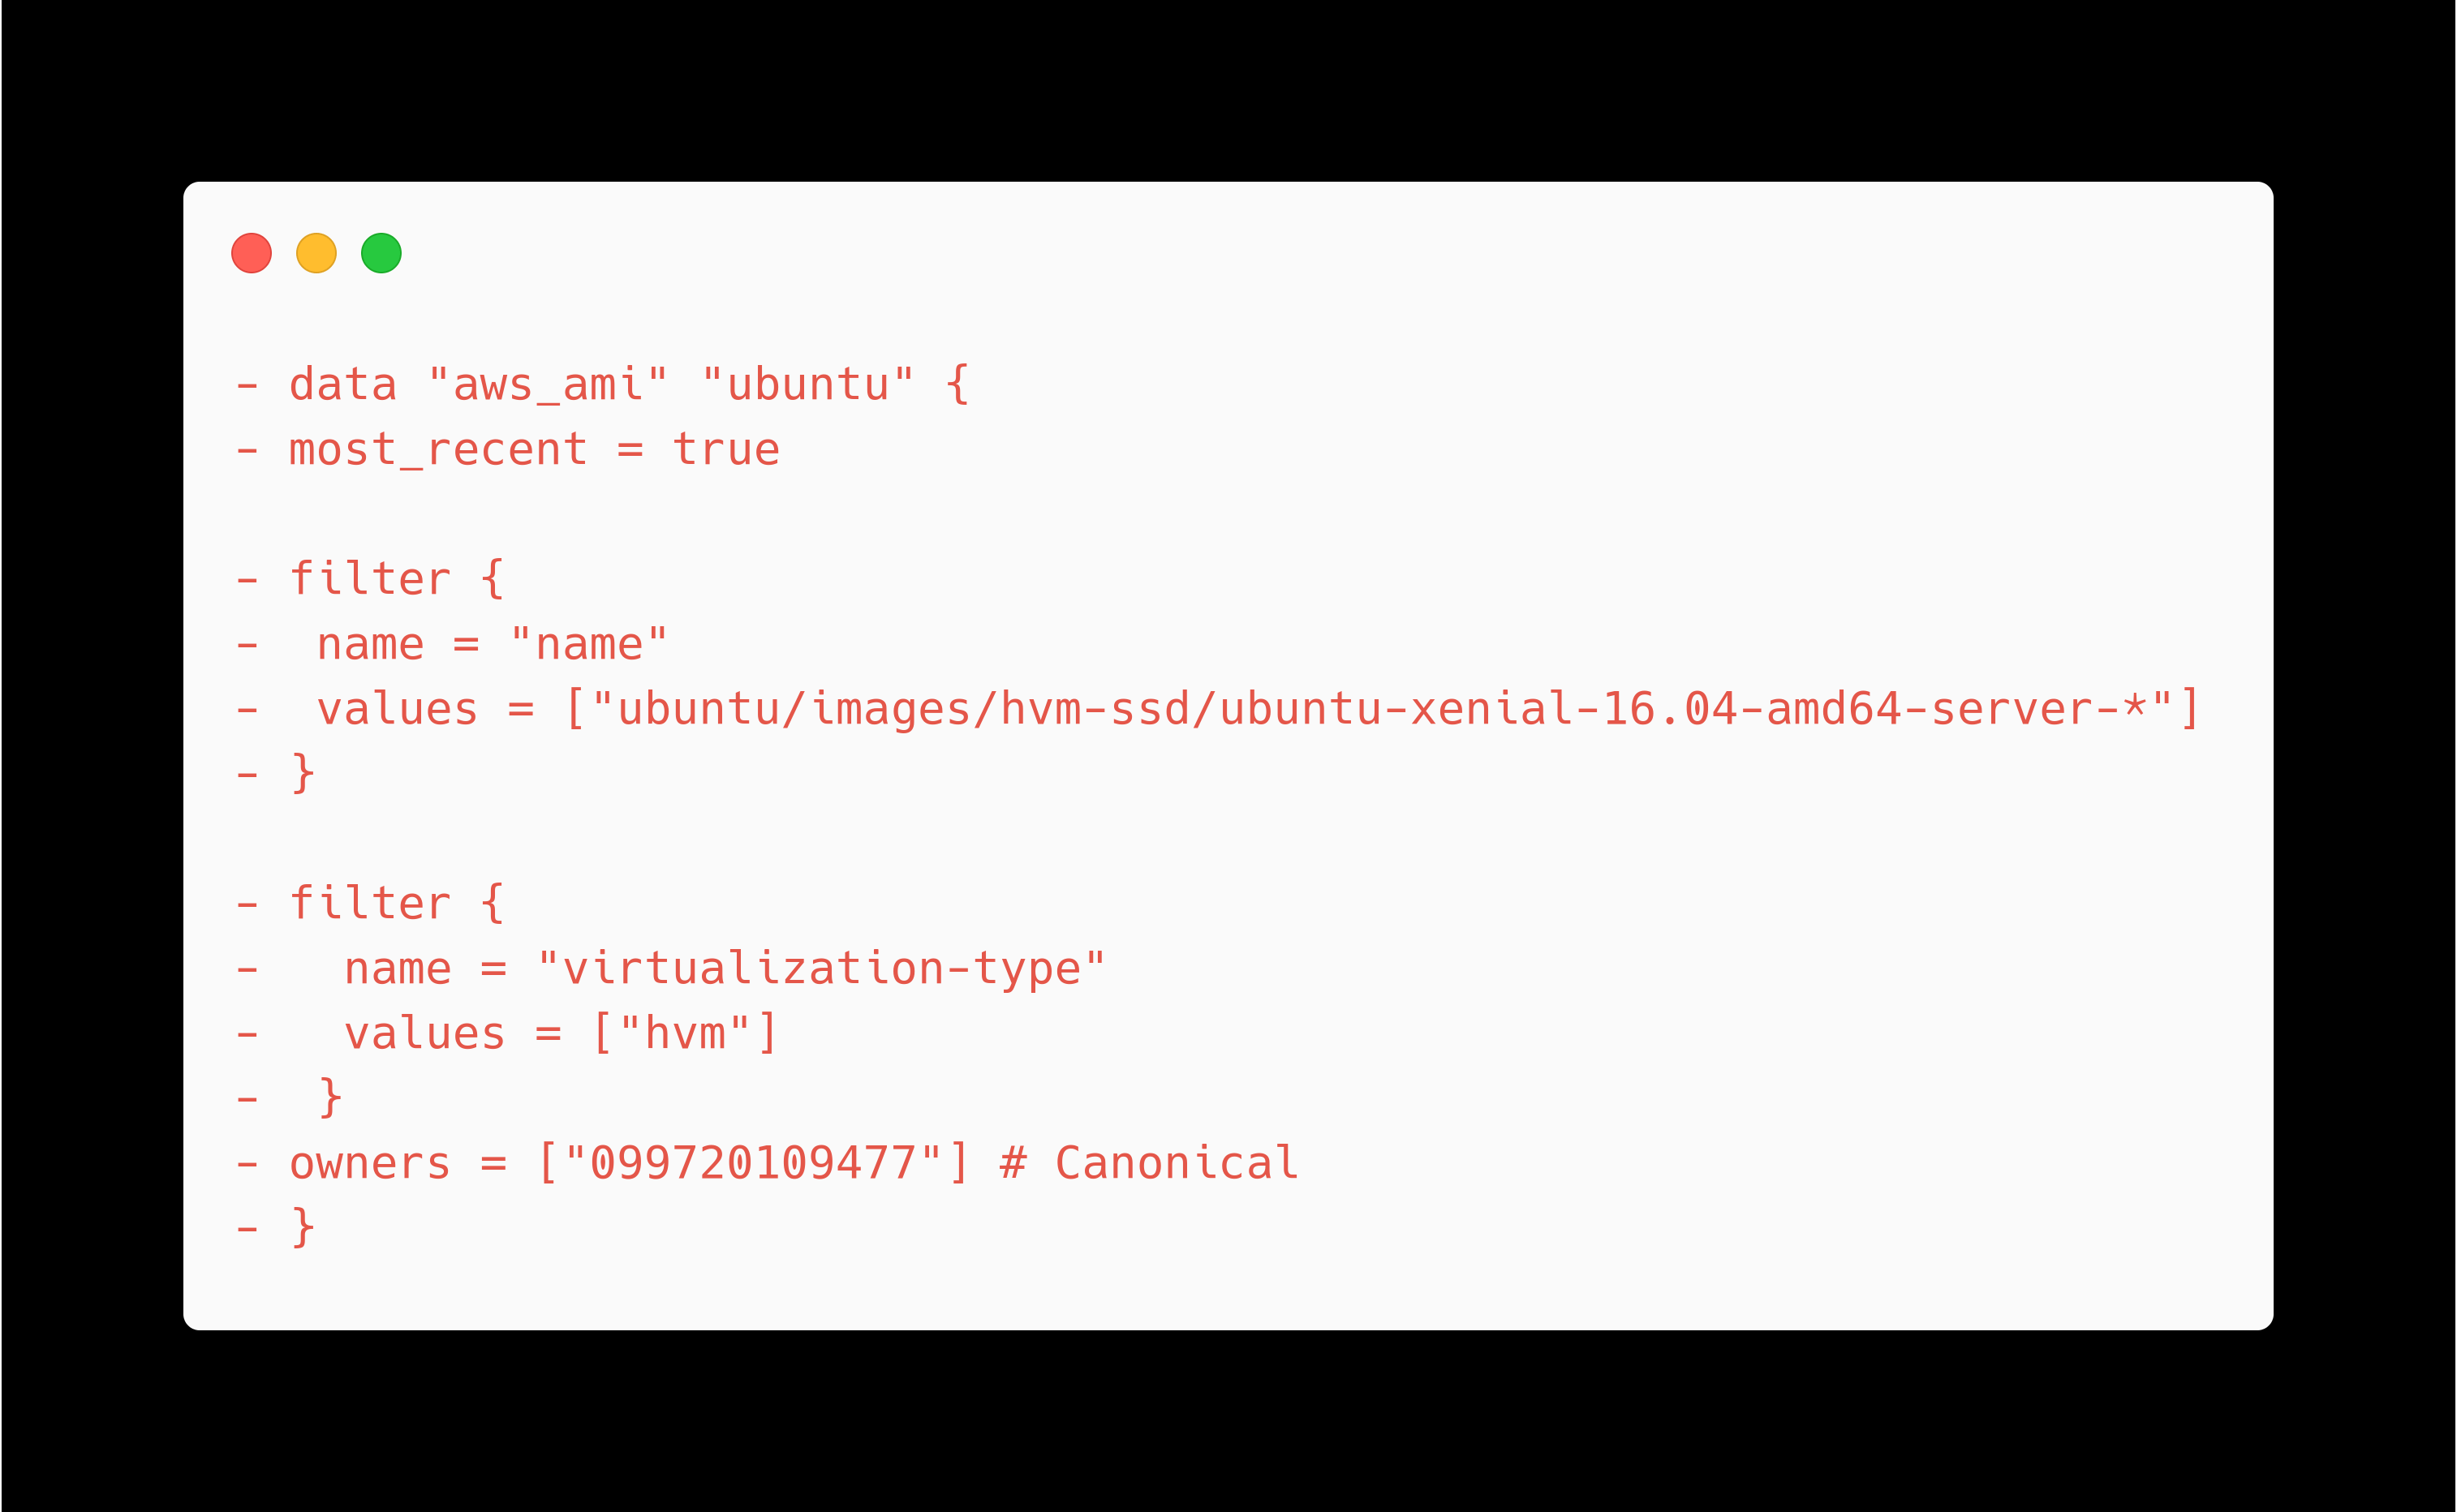
In aws_instance resource, update the ami attribute to use the lookup function.
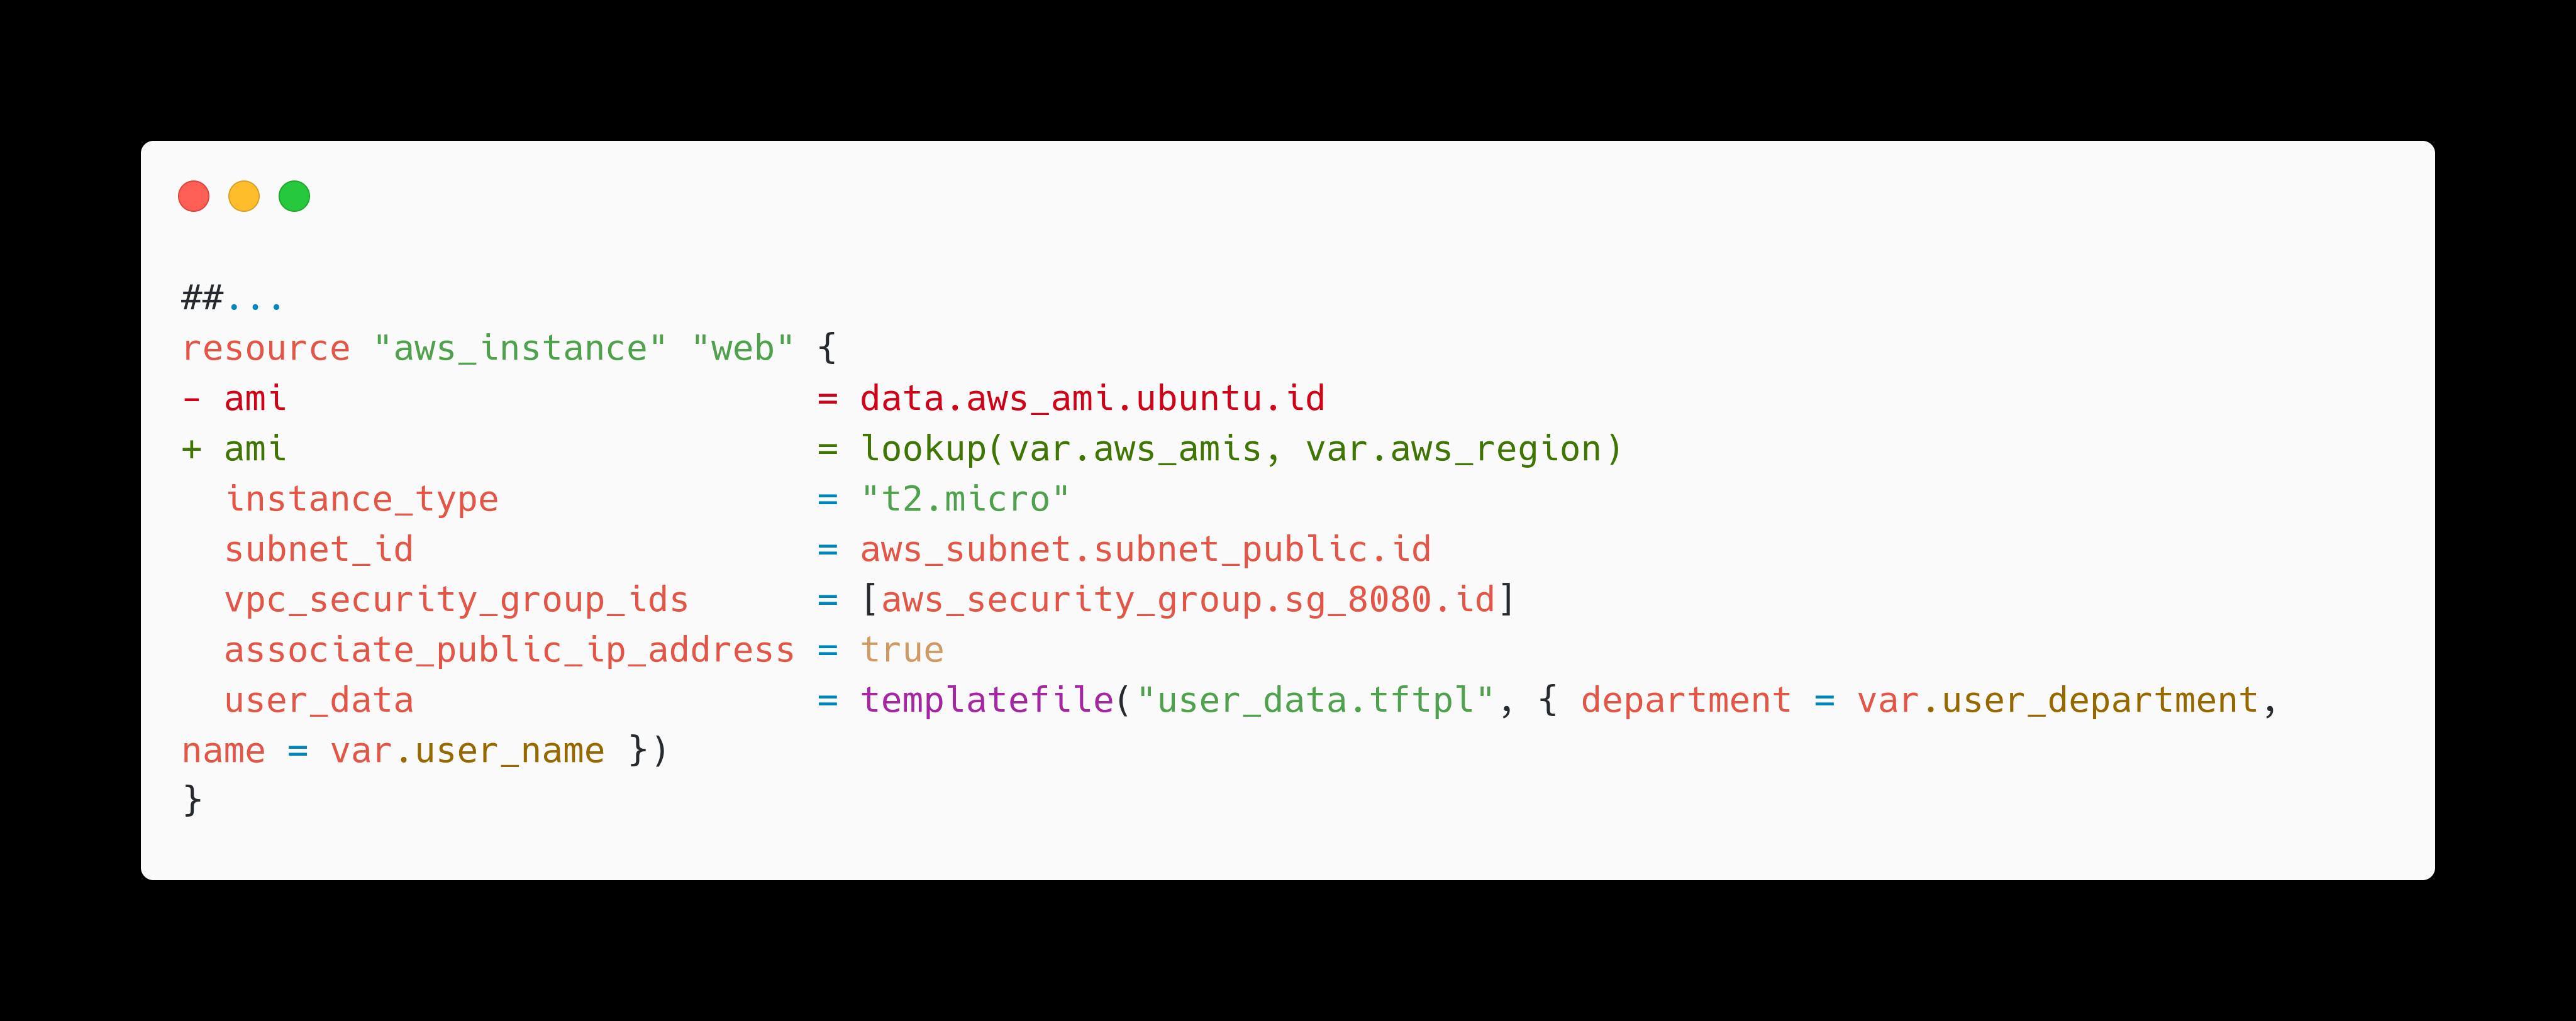
The ami is a required attribute for the aws_instance resource, so the lookup function must return a valid value for Terraform to apply your configuration. The lookup function arguments are a map, the key to access the map, and an optional default value in case the key does not exist.
Next, add the following configuration for an ami_value output to your outputs.tf file. This output lets you verify the AMI returned by the lookup function.
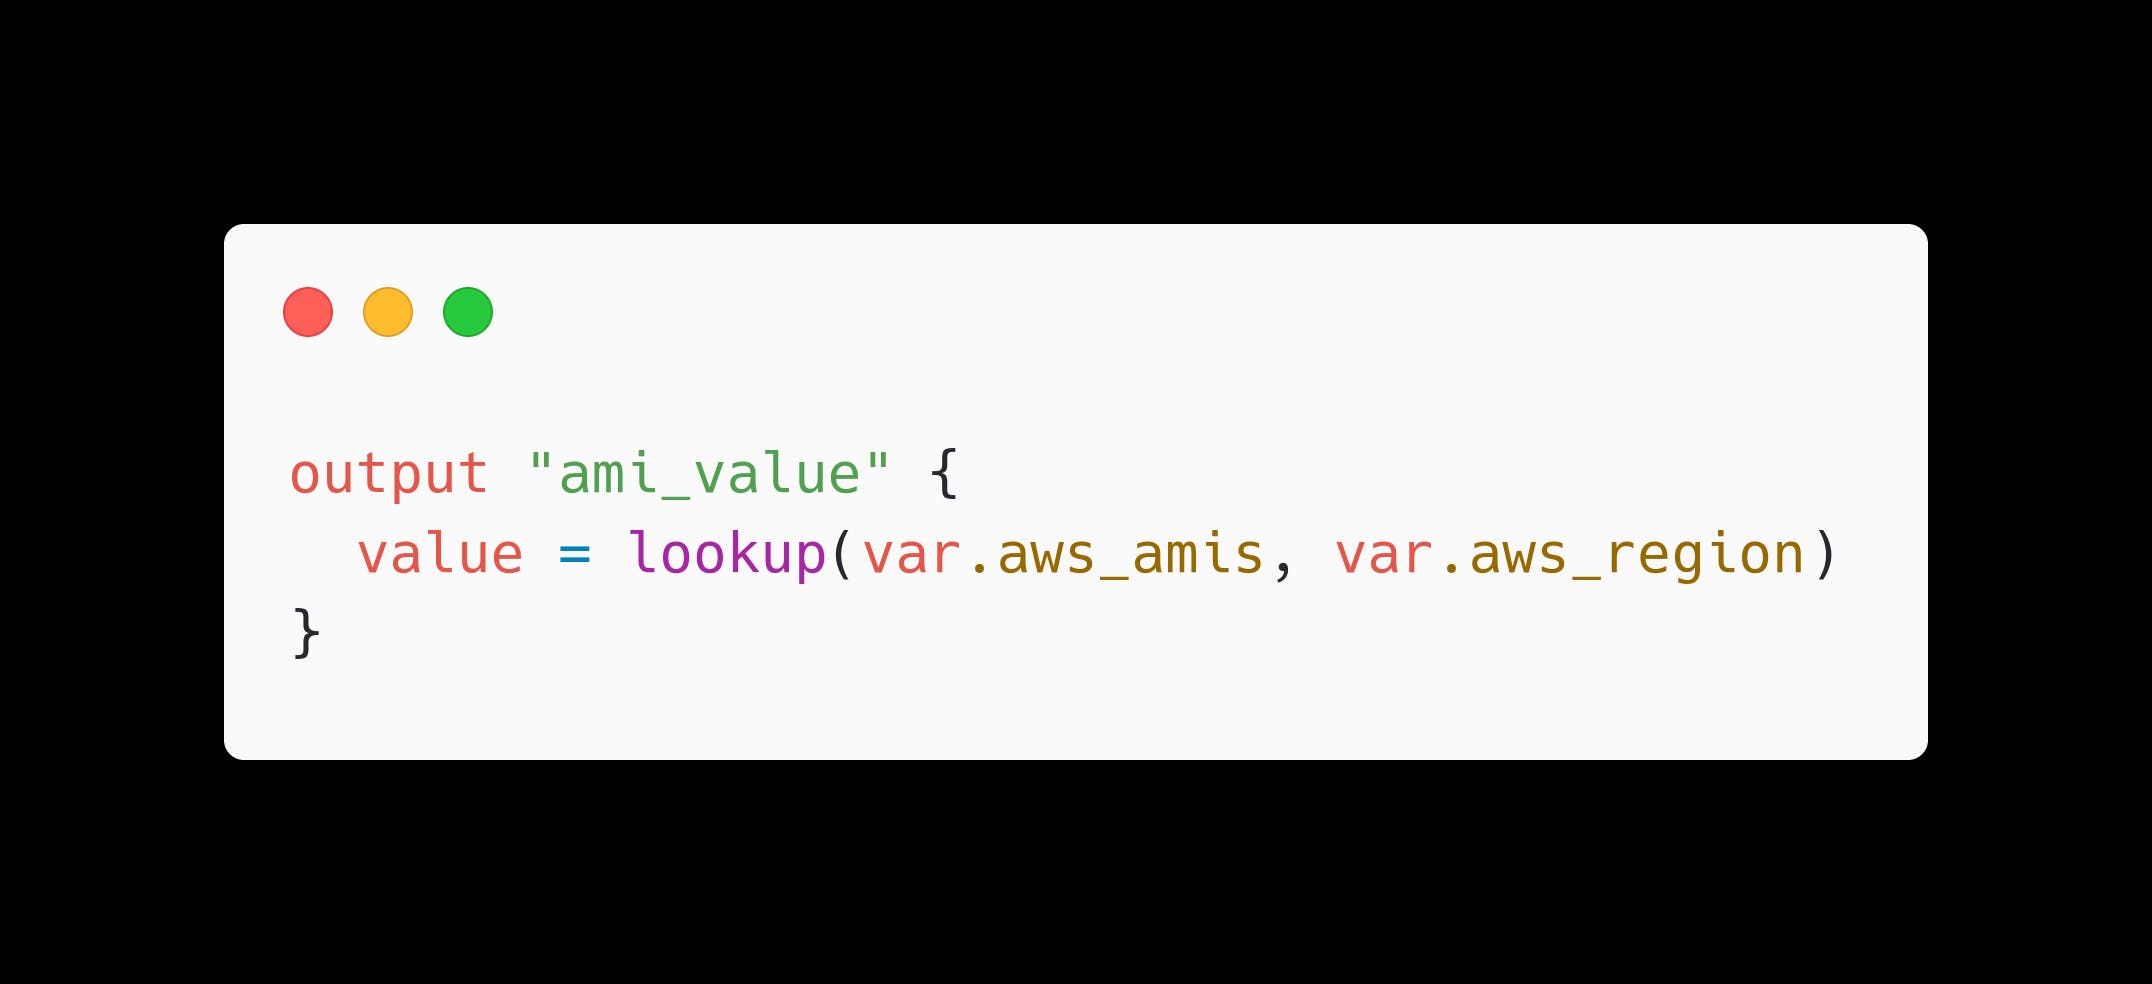
Now run terraform plan to review the execution plan for these changes, using a command-line variable flag to set the region to us-east-2. The output now includes the selected AMI ID, which Terraforms determined using the lookup function.
Plain Text
terraform plan -var "aws_region=us-east-2"
Use the file function
Create an SSH key and a security group resource
Generate a new SSH key called ssh-key. The argument provided with the -f flag creates the key in the current directory and creates two files called ssh_key and ssh_key.pub. Change the placeholder email address to your email address.
Plain Text
ssh-keygen -C "kunalsingh.sep21@gmail.com" -f ssh_key
Add the following configuration to main.tf to create a new security group and AWS key pair.
In main.tf, add a new aws_security_group resource.
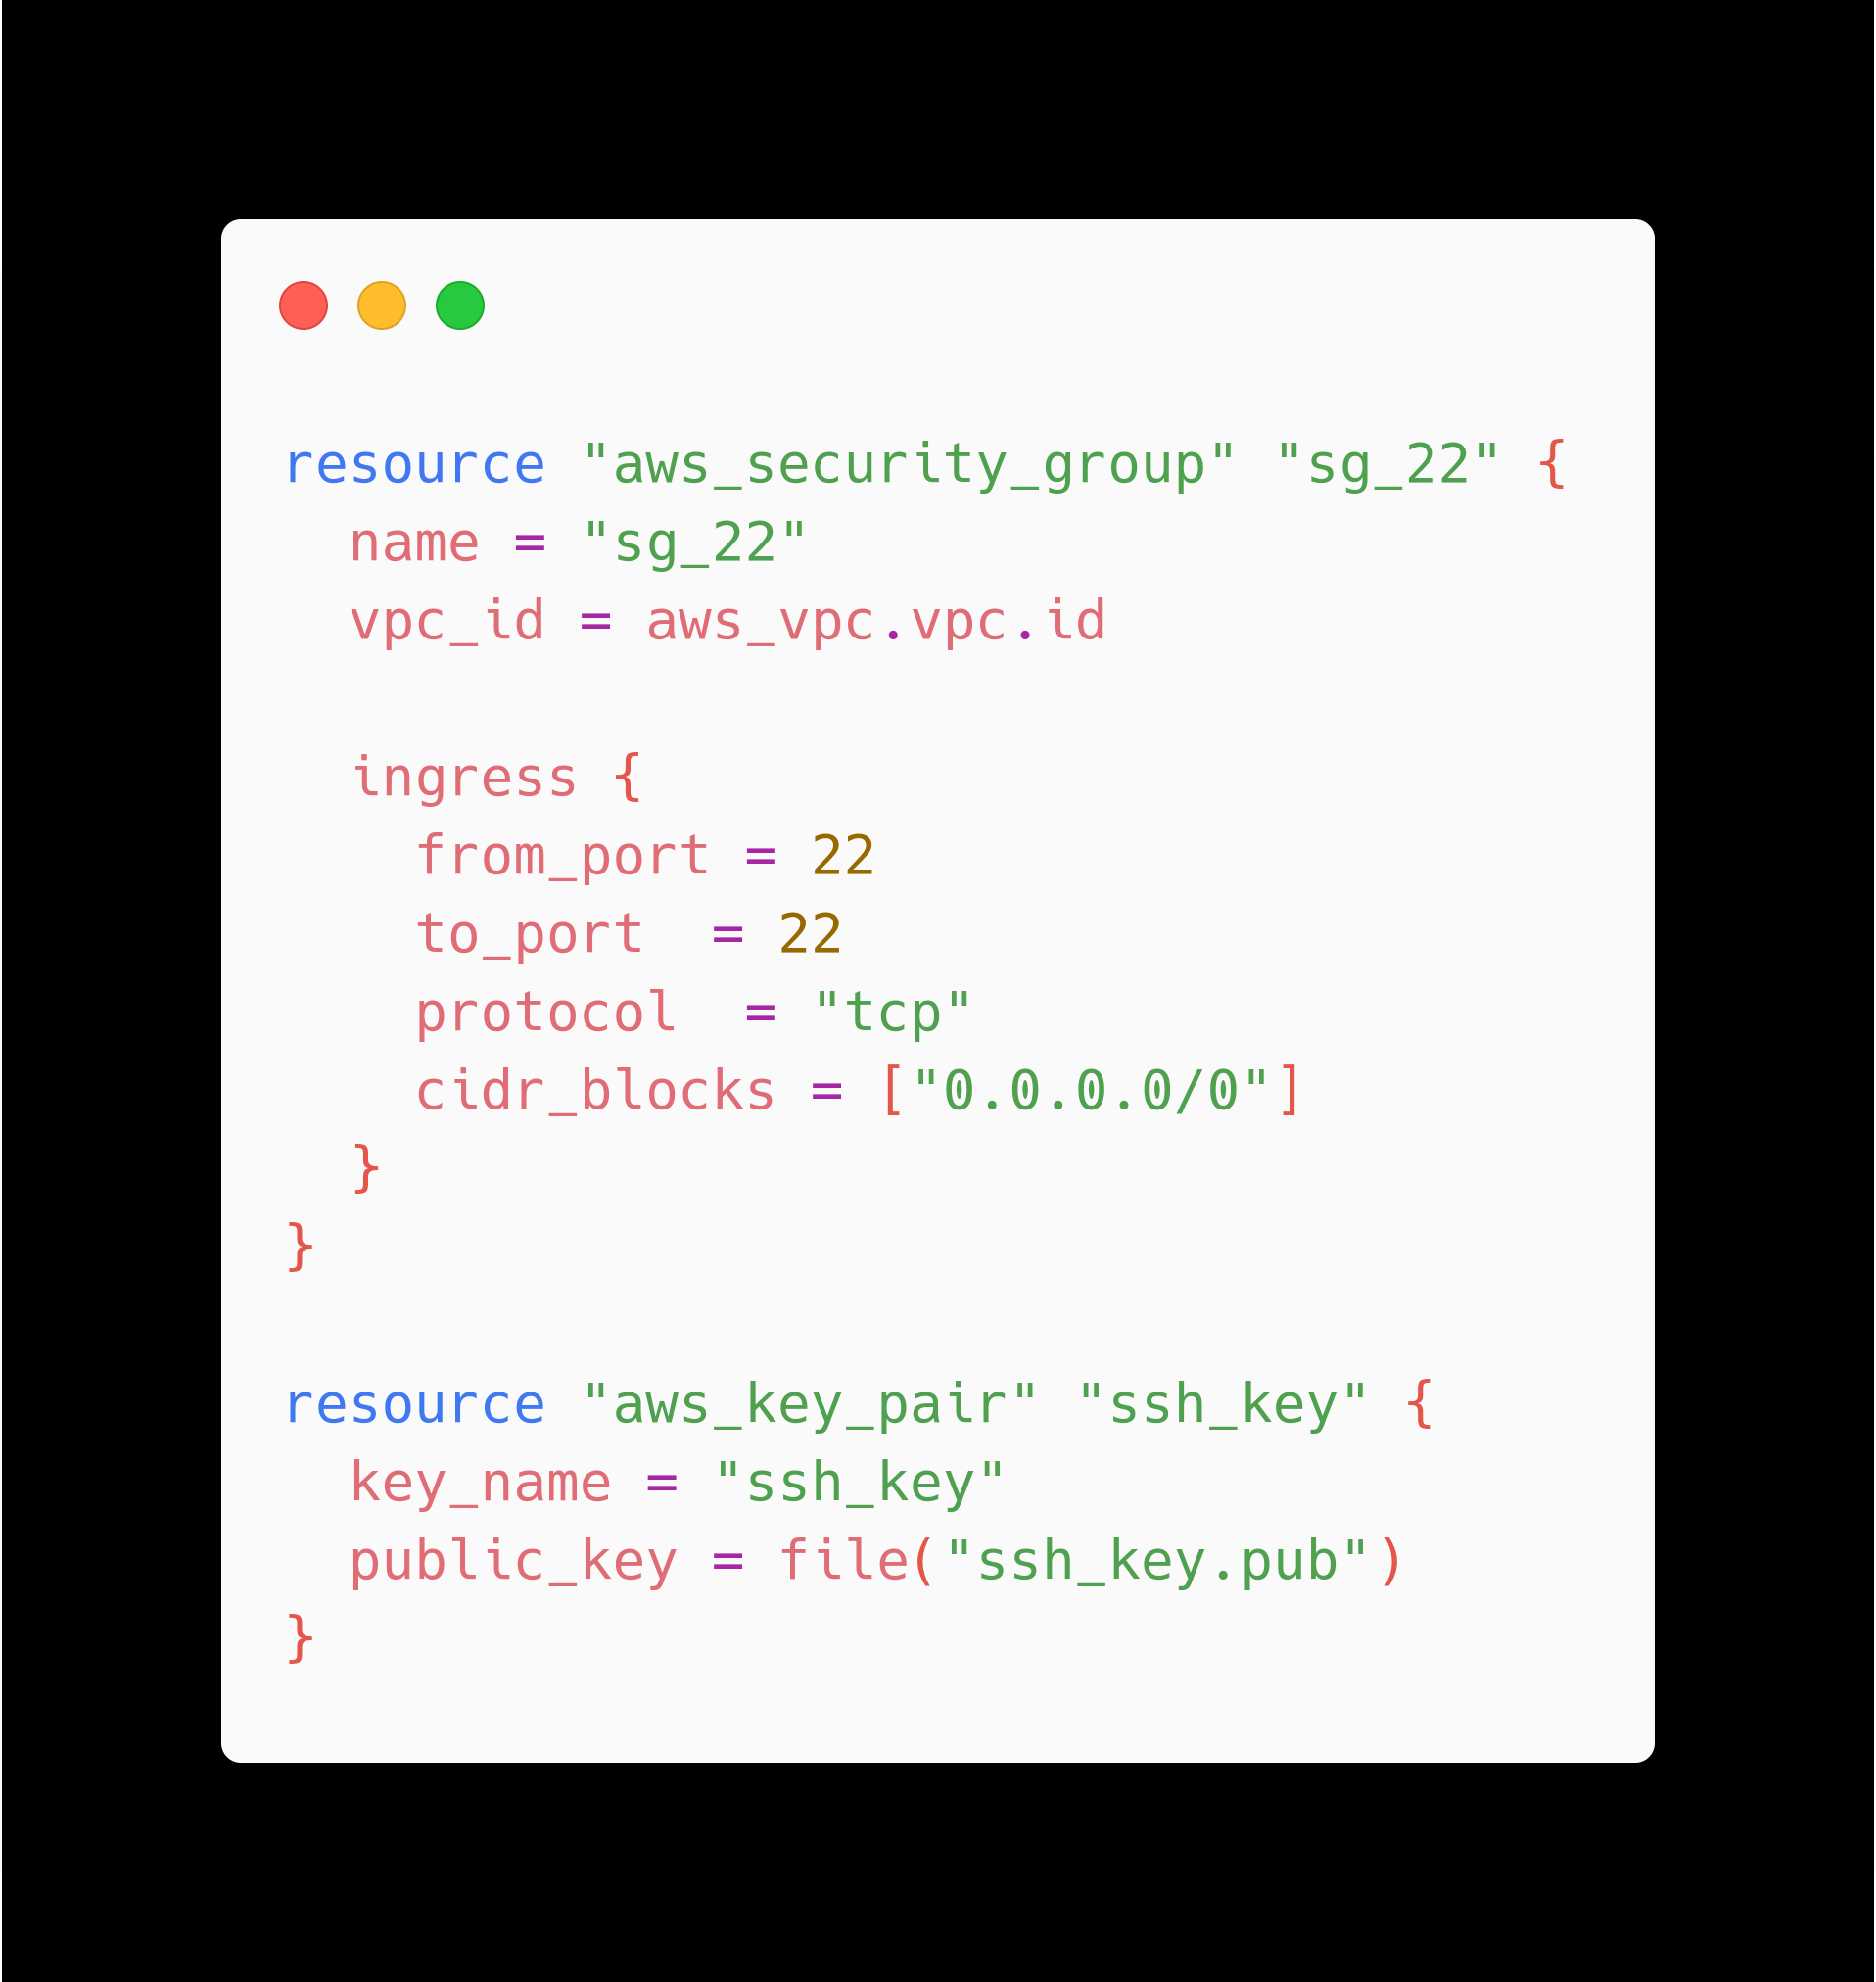
This configuration uses the file function to read the contents of a file to configure an SSH key pair. The file function does not interpolate values into file contents, you should only use it with files that do not need modification.
Next, edit your aws_instance.web resource to use the new security group and key pair.
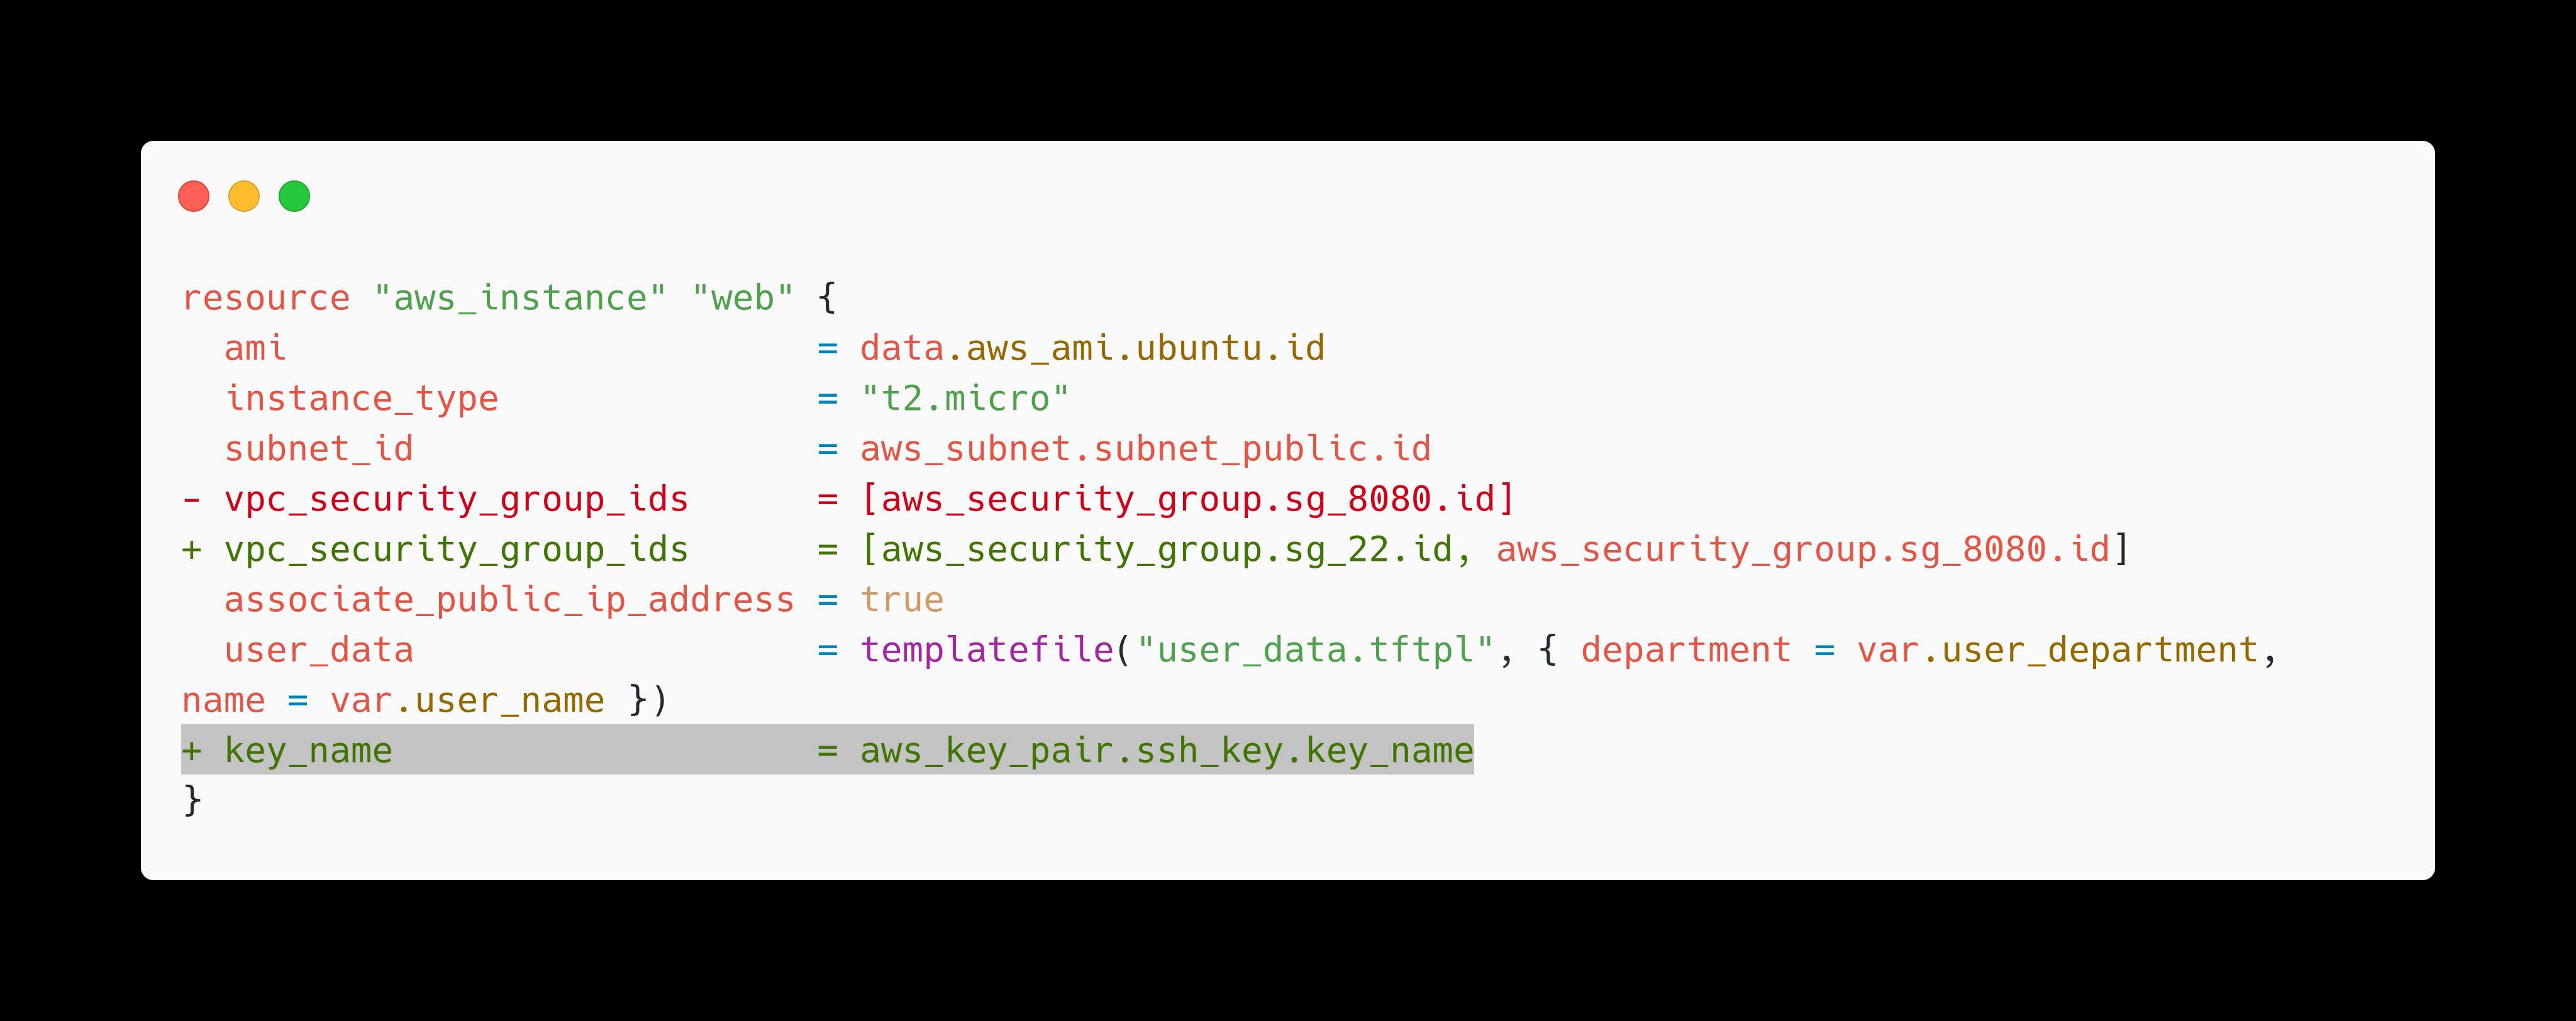
Apply your configuration to create the resources.
Plain Text
terraform apply
To confirm that your instance now accepts traffic on port 22, SSH into it from your terminal.
Plain Text
ssh ubuntu@$(terraform output -raw web_public_ip) -i ssh_key
Clean up resources
Plain Text
terraform destroy
If you used Terraform Cloud for this tutorial, after destroying your resources, delete the learn-terraform-functions workspace from your Terraform Cloud organization.
Thank you so much for taking your valuable time for reading.
I took the initiative to learn in public and share my work with others. I tried my level best in squeezing as much information as possible in the easiest manner. Hope you learned something new today :)
Any feedback for further improvement will be highly appreciated!

